
How to Use Masking Film

I've been asked by you guys over on Instagram to explain how I use masking film. It's been about 3 months coming, but here it is! Masking off your work in watercolor is a very common technique. Unlike oil or acrylic, you can't easily hide or correct any mistakes in watercolor. The paint is translucent and stains the paper, so if you need to work in stages or keep the white of your paper in some areas you'll need a way to mask off that section. Especially because watercolors have a mind of their own and don't always go where you want them to.
What You'll Need
Here is a list of supplies I like to use when I use masking film:
Masking Film (friskit) - You can get this at Michaels or Hobby Lobby (or order off Amazon)
Hard Rubber Brayer - I found this in the craft section. It helps to smooth out the film and reduce air bubbles.
X-Acto Knife - I like to use heavier knives so I don't have to press down to make a cut.
New Blades - ALWAYS use a new blade when you're cutting out your masking film!
The Process
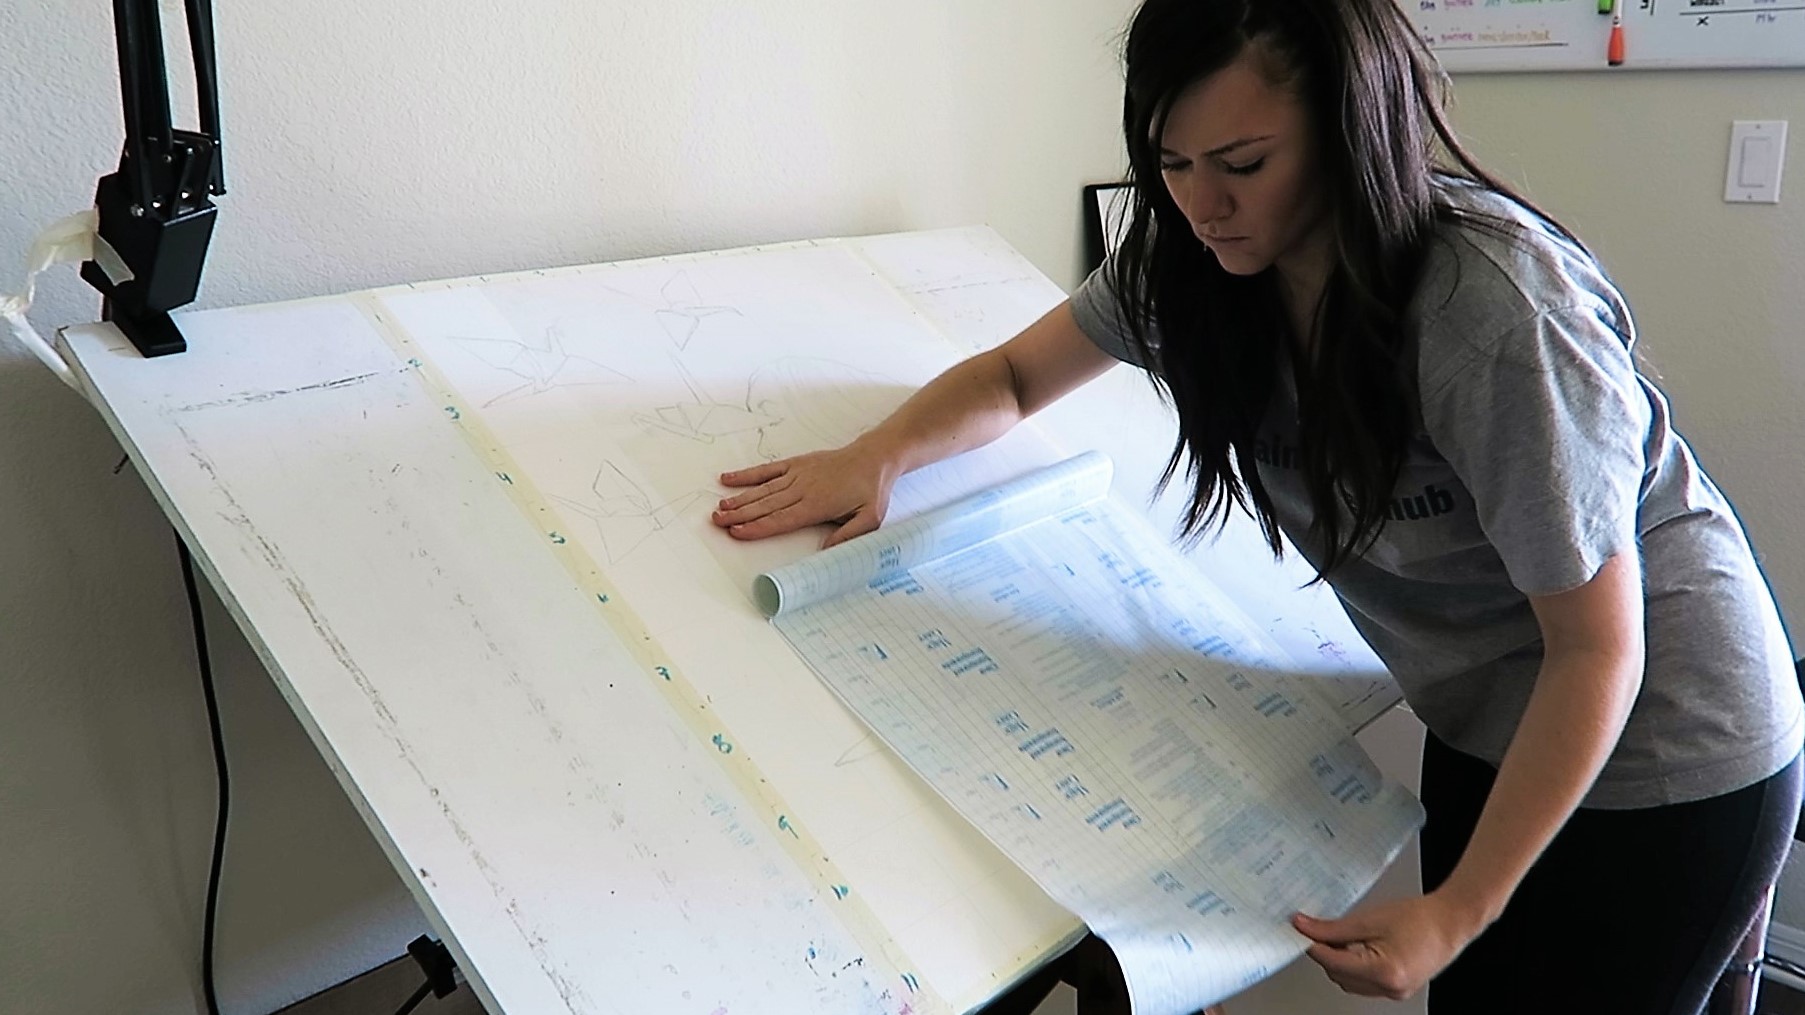
I always tape down my artwork to my drawing table. I don't want the paper moving around, especially when I'm using masking film. Once you have your paper secured, you can start measuring out how much film you'll need.
Unroll your masking film over your paper and use the measurement guide to determine how much of the film you'll need. Cut it down to size and carefully remove the paper backing from the film.
I like to start at the top of my paper and press down the masking film as I remove the back. Because it's been rolled up, it will start to fold back and stick to itself, so work slow and be careful.
Once I have my film in place I go over it with my brayer to make sure I smooth out all the air pockets. If you don't remove the air pockets and just start cutting then your edges will shift when you smooth out your masking film.
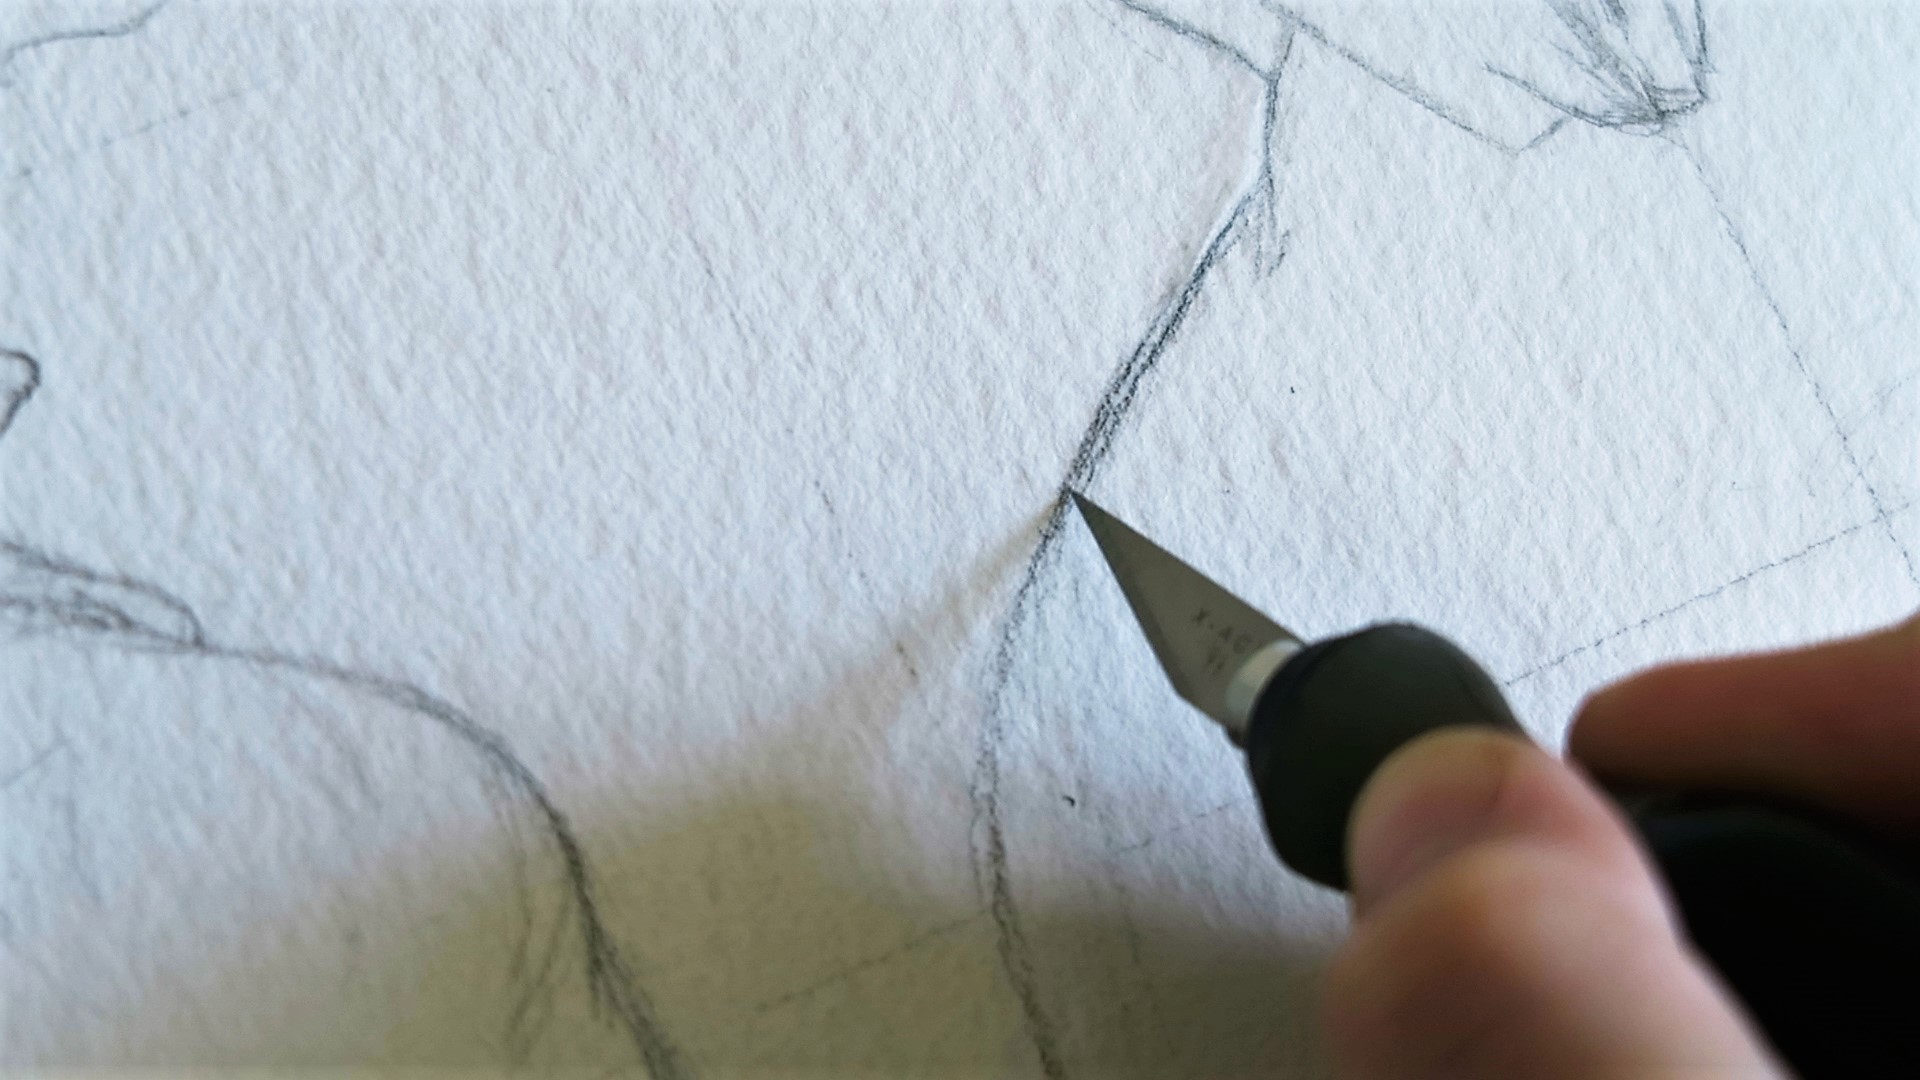
Now you can start cutting out your edges. I recommend using a heavy knife with a new blade for this. If you have to press down or apply pressure to make the cut you can actually scratch your paper (and the paint will soak into those scratches leaving really dark lines where you damaged your paper).
Follow the outline of the area you want to mask off and work slowly on curves and edges to make a smooth cut. If you lose your place, use the edge of your blade to gently pull-up on the masking film to see where your cut stopped.
Once you finished cutting your outline, gently remove the excess masking film. Go slowly in case there are areas that you didn't cut through that need correcting. I save the left over masking film for smaller pieces that I might need to mask off or to mask areas that didn't get covered completely by my initial sheet.
Use your roller again and really make sure you remove all air bubbles and that your edges are pressed firmly to the paper. If there are any gaps or loose edges your paint will soak through and stain the area you're trying to mask. Seriously, go crazy and don't stop until you're 100% certain that every little edge is secure.


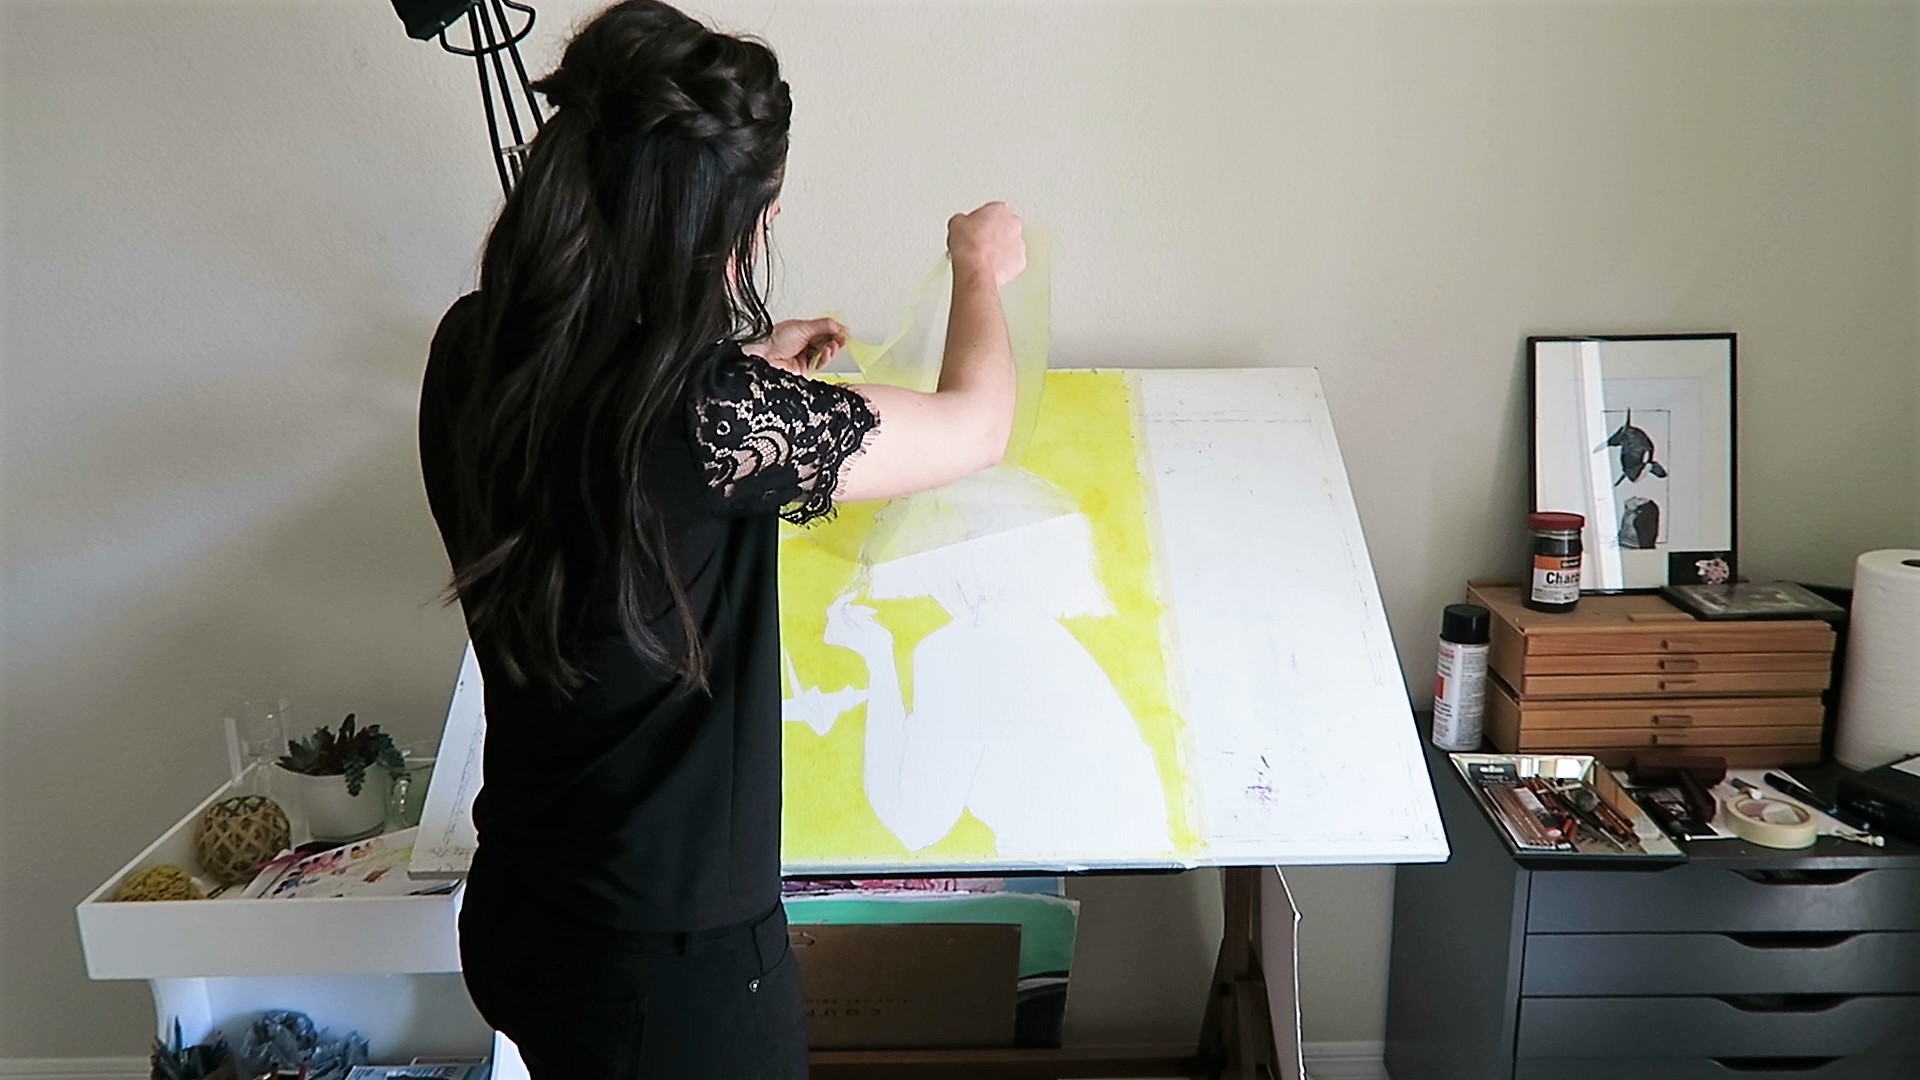
Now that your masking film is in place you can go wild and paint! I love using masking film to block off my subject so I can paint my background as fast as possible. I don't have to worry about working around edges and making things smooth is so much easier. After you're finished with the background let your paint dry completely. A good way of telling if your paper is still wet is to touch it, and if it feels cold you need to give it 30 minutes to an hour longer.
At this point you can remove your masking film and begin working on your subject. I absolutely love trick because my art is so large, and I was always racing against the clock to get the background done quickly without ruining my subject. By the time I'd get to one side of the paper, the other side was already drying and I'd end up with brush strokes everywhere. Now, if you're just needing to mask off small areas I would using masking fluid instead of the film. I'll show you how I use that (and some of the cool techniques you can do with it!) next week.
In Conclusion
That's all there is to it! It's a really easy process. And while it may take up some time in the beginning, it's going to make your painting time go so much faster. I've found that doing more work upfront really increases the quality of the work I'm able to produce once I sit down to draw/paint. Take your time drawing out your work, and be patient when it comes to all of the work before you get to finally paint. I guarantee it will improve the quality of your finished artwork.
Please share this post if you found it helpful; and let me know if you've tried masking film and what you think about it. I'd love to hear about any questions or tips you might have!